Stigmas · Skills & special abilities · Passive priorities · Full class guide
Farm · Editorial progression targets. Spend within your available points.
Farm LOADOUT
Stigmas
Equip these 4 Stigmas
Pack damage and faster travel.

Invincibility Mantra
Stigma Lv. 1 → 20Party damage amplification/tolerance toggle; does not stack with Cleric's Light of Protection. Higher skill level wins, Chanter wins a tie.
Use in this set: Party damage/protection toggle.

Crushing Blow
Stigma Lv. 1 → 5Rapid gap-closing hit that lowers enemy defense; deals more damage against impact-controlled targets.
Use in this set: Defense debuff.

Marchutan's Wrath
Stigma Lv. 1 → 5Area attack that temporarily activates Dark Crush.
Use in this set: Area damage + Dark Crush trigger.

Speed Mantra
Stigma Lv. 1 → 5Party movement-speed toggle with chance-based healing on attacks.
Use in this set: Travel speed + incidental recovery.
Coordinate Mantra with Cleric Protection. Barrier Spell cannot prevent every powerful attack.
Stigmas level with Shards. They do not use Mastery Specialty slots.
Alternative Stigmas & when to use them

Obliterate
Stigma Lv. 0 → 0Area attack with knockdown potential and stagger damage.
Not equipped in this set. Situational alternative.

Focused Defense
Stigma Lv. 0 → 0Maintained frontal weapon block with improved block reduction; successful blocks restore MP/action points.
Not equipped in this set. Situational alternative.

Power of Protection
Stigma Lv. 0 → 0Temporarily generates HP-scaled shields when the caster or nearby party members take attacks.
Not equipped in this set. Party shields when hit.

Ensnaring Mark
Stigma Lv. 0 → 0Area damage and sealing potential.
Not equipped in this set. Situational alternative.

Healing Touch
Stigma Lv. 0 → 0Mobile heal for the caster and nearby party members.
Not equipped in this set. Mobile party healing.

Power of the Gale
Stigma Lv. 0 → 0Party combat-speed buff and cooldown reduction; recipients cannot gain Cleric's corresponding Earth blessing effect for one minute.
Not equipped in this set. Party speed + cooldown support.

Guardian's Blessing
Stigma Lv. 0 → 0Raises personal maximum HP and immediately restores health; cannot be removed by buff dispel.
Not equipped in this set. Situational alternative.

Assault Impact
Stigma Lv. 0 → 0Area HP/MP damage and stun potential; defense rises with targets hit.
Not equipped in this set. Situational alternative.

Barrier Spell
Stigma Lv. 0 → 0Temporarily prevents party HP from dropping below a threshold, with exceptions for powerful attacks and a shared anti-immunity lockout.
Not equipped in this set. Planned party survival window.
Play it in 3 steps
- Activate Mantra buffs; use Speed Mantra between objectives.
- Crushing Blow → Spinning Strike → Dark Crush; use Marchutan's Wrath when safe.
- Weave Slaughter and Inexorable Blow; heal/cleanse manually.
Skills
Active skills & special abilities
All 12 active skills, their effects and Specialty selections for Farm.
Option numbers match the five lines shown on each skill. Total level includes gear and Daevanion bonuses. At total 16 all five options are available, but you still have two slots. The third slot opens at total 20. Checked options show our recommended total-20 setup; use the milestone selections below at lower levels. This is not a requirement to raise every skill to 20.

Slaughter
Base Lv. 8 → 10Basic attack chain that damages enemies and restores MP.
Use it: Weave between spenders and choose the early MP specialty when resources run low.
At early level 8, prioritize MP recovery.
Special abilities · Specialty
Recommended setup · Total Lv. 20 · 3 slots
- 1+20% MP restored✓ RecommendedUnlocks at total Lv. 8
- 2Absorbs 0.7% HP✓ RecommendedUnlocks at total Lv. 8
- 3+50% Multi-Hit on hitOptionalUnlocks at total Lv. 8
- 4-1s [Spinning Strike] cooldown on hit✓ RecommendedUnlocks at total Lv. 12
- 5Adds [Storm Chain] Chain SkillOptionalUnlocks at total Lv. 16
Recommended selections
Reduce resource downtime during repeated casts. These selections apply if you use this skill. They do not raise its investment priority.
Global 1.0.21.0 client-data display; editorial recommendations · Specialty reference ↗

Dark Crush
Base Lv. 8 → 10Mobile ranged damage activated by ranged-skill use.
Use it: Central damage priority. Consume its activation before spending another trigger needlessly.
Early critical-oriented damage; HP absorption when solo survival is limiting.
Special abilities · Specialty
Recommended setup · Total Lv. 20 · 3 slots
- 1Absorbs 0.7% HP✓ RecommendedUnlocks at total Lv. 8
- 2Deals extra damage on attacking a target afflicted with Impact-type statusOptionalUnlocks at total Lv. 8
- 3Critical Hit on hit✓ RecommendedUnlocks at total Lv. 8
- 4Adds [Piercing Strike] Chain SkillOptionalUnlocks at total Lv. 12
- 5Removes [Dark Crush] cooldown✓ RecommendedUnlocks at total Lv. 16
Recommended selections
Improve recovery when incoming damage limits uptime. These selections apply if you use this skill. They do not raise its investment priority.
Global 1.0.21.0 client-data display; editorial recommendations · Specialty reference ↗

Spinning Strike
Base Lv. 8 → 10Mobile area attack that stacks personal critical-damage amplification up to twice.
Use it: Use early in the damage chain for the buff and follow with Dark Crush when activated.
Use the cooldown-reduction option from the reviewed early setup.
Special abilities · Specialty
Recommended setup · Total Lv. 20 · 3 slots
- 1-5s cooldown✓ RecommendedUnlocks at total Lv. 8
- 2+10% Heal Boost (up to 20%)OptionalUnlocks at total Lv. 8
- 3Up to +20% damage when less targets hit✓ RecommendedUnlocks at total Lv. 8
- 440% chance to inflict Seal for 3sOptionalUnlocks at total Lv. 12
- 5Ignores Block and Evasion and lands as a Critical Hit✓ RecommendedUnlocks at total Lv. 16
Recommended selections
Bring a useful skill back sooner; respect its trigger condition. These selections apply if you use this skill. They do not raise its investment priority.
Global 1.0.21.0 client-data display; editorial recommendations · Specialty reference ↗

Inexorable Blow
Base Lv. 8 → 10Repeatable attack chain with stagger damage.
Use it: Filler between Dark Crush windows; start with MP reduction and change to single-target damage when sustain permits.
Choose MP reduction before single-target damage if resources are tight.
Special abilities · Specialty
Recommended setup · Total Lv. 20 · 3 slots
- 1-20% MP consumed✓ RecommendedUnlocks at total Lv. 8
- 2+200 Block while using skillOptionalUnlocks at total Lv. 8
- 3Deals up to 12% more damage when less targets are hit✓ RecommendedUnlocks at total Lv. 8
- 4-200 enemy Accuracy for 3s on landing Bursting BlowOptionalUnlocks at total Lv. 12
- 5Ignores Block and Evasion and lands as Multi-Hit✓ RecommendedUnlocks at total Lv. 16
Recommended selections
Reduce resource downtime during repeated casts. These selections apply if you use this skill. They do not raise its investment priority.
Global 1.0.21.0 client-data display; editorial recommendations · Specialty reference ↗

Backdraft Crush
Base Lv. 5 → 8Attack with stun potential and stagger damage.
Use it: A trigger in the reviewed Dark Crush chain; preserve the activation order.
Special abilities · Specialty
Recommended setup · Total Lv. 20 · 3 slots
- 1Changes to AoE damage✓ RecommendedUnlocks at total Lv. 8
- 2+1s [Impactful Crush] Stun durationOptionalUnlocks at total Lv. 8
- 3Changes to mobile skill✓ RecommendedUnlocks at total Lv. 8
- 4+30% Skill Speed✓ RecommendedUnlocks at total Lv. 12
- 5+20% [Impactful Crush] Stun ChanceOptionalUnlocks at total Lv. 16
Recommended selections
Use on packs that can be grouped safely. These selections apply if you use this skill. They do not raise its investment priority.
Global 1.0.21.0 client-data display; editorial recommendations · Specialty reference ↗

Recuperation
Base Lv. 5 → 8Immediate party-area heal and one weakening-effect removal, followed by healing over time.
Use it: Keep manual for group recovery and cleansing; consecutive-cast specialty adds flexibility.
Consecutive casts help separate cleanse and healing responses.
Special abilities · Specialty
Recommended setup · Total Lv. 20 · 3 slots
- 1+1 consecutive use and Heal over Time can stack up to 2 times✓ RecommendedUnlocks at total Lv. 8
- 2Removes up to 2 debuffsOptionalUnlocks at total Lv. 8
- 3+4s healing durationOptionalUnlocks at total Lv. 8
- 4+5% HP restored✓ RecommendedUnlocks at total Lv. 12
- 5-3s cooldown✓ RecommendedUnlocks at total Lv. 16
Recommended selections
Keep an additional cast available for the next response. These selections apply if you use this skill. They do not raise its investment priority.
Global 1.0.21.0 client-data display; editorial recommendations · Specialty reference ↗

Rushing Smash
Base Lv. 5 → 8Gap-closing attack that restores MP and contributes to stagger.
Use it: Use deliberately to engage or recover contact; avoid charging into an unsafe boss front.
Special abilities · Specialty
Recommended setup · Total Lv. 20 · 3 slots
- 1-20% target's Impact-type Resist for 5sOptionalUnlocks at total Lv. 8
- 2Changes to Charge Skill, dealing up to 200% more damage✓ RecommendedUnlocks at total Lv. 8
- 350% chance to trigger [Heat Wave Blow] on hit✓ RecommendedUnlocks at total Lv. 8
- 4Resets cooldown on defeating an enemy✓ RecommendedUnlocks at total Lv. 12
- 5Ignores Block and Evasion and lands as Multi-HitOptionalUnlocks at total Lv. 16
Recommended selections
Support damage or utility under the condition written on this option. Control and kill-triggered effects depend on the target. Do not assume a boss can be controlled.
Global 1.0.21.0 client-data display; editorial recommendations · Specialty reference ↗

Gust Rampage
Base Lv. 1 → 1Damage against a staggered target.
Use it: Use during actual stagger; pairs with Raging Spell and can supply selected resource/healing utility.
Special abilities · Specialty
Recommended setup · Total Lv. 20 · 3 slots
- 1Absorbs 5% HP✓ RecommendedUnlocks at total Lv. 8
- 2Restores 120 MPOptionalUnlocks at total Lv. 8
- 3Changes to mobile skillOptionalUnlocks at total Lv. 8
- 4Multi-Hit on hit✓ RecommendedUnlocks at total Lv. 12
- 5-1s all skill cooldowns on hit✓ RecommendedUnlocks at total Lv. 16
Recommended selections
Improve recovery when incoming damage limits uptime. Use only during a real stagger opportunity; this is not a normal filler skill.
Global 1.0.21.0 client-data display; editorial recommendations · Specialty reference ↗

Headlong Blow
Base Lv. 1 → 1After a successful block, deals area damage with sealing potential.
Use it: A conditional counter, not a dependable opener without the block trigger.
Special abilities · Specialty
Recommended setup · Total Lv. 20 · 3 slots
- 140% chance to inflict Stun for 3sOptionalUnlocks at total Lv. 8
- 2+20% Seal ChanceOptionalUnlocks at total Lv. 8
- 3Up to +20% damage when more targets hit✓ RecommendedUnlocks at total Lv. 8
- 4Ignores Block and Evasion and lands as Multi-Hit✓ RecommendedUnlocks at total Lv. 12
- 525% chance to reset [Heat Wave Blow] cooldown on Block✓ RecommendedUnlocks at total Lv. 16
Recommended selections
Use on packs that can be grouped safely. These selections apply if you use this skill. They do not raise its investment priority.
Global 1.0.21.0 client-data display; editorial recommendations · Specialty reference ↗

Tremor Crash
Base Lv. 1 → 1After emergency evade, moves to the target and attacks with stun potential.
Use it: Re-engage only when the destination is safe; do not automate movement into mechanics.
Special abilities · Specialty
Recommended setup · Total Lv. 20 · 3 slots
- 1Restores 300 Stamina on hitOptionalUnlocks at total Lv. 8
- 2+10m [Tremor Crush] range✓ RecommendedUnlocks at total Lv. 8
- 3+50% Multi-Hit on hit✓ RecommendedUnlocks at total Lv. 8
- 4Adds [Surging Strike] Chain Skill✓ RecommendedUnlocks at total Lv. 12
- 5+25% [Tremor Crush] Stun ChanceOptionalUnlocks at total Lv. 16
Recommended selections
Keep the skill usable while positioning for mechanics. These selections apply if you use this skill. They do not raise its investment priority.
Global 1.0.21.0 client-data display; editorial recommendations · Specialty reference ↗

Wave Blow
Base Lv. 1 → 1Hits a stunned target and knocks it down.
Use it: A control chain for eligible enemies rather than a universal boss damage priority.
Special abilities · Specialty
Recommended setup · Total Lv. 20 · 3 slots
- 1Multi-Hit on hit✓ RecommendedUnlocks at total Lv. 8
- 2+6m RangeOptionalUnlocks at total Lv. 8
- 3+1s Knockdown durationOptionalUnlocks at total Lv. 8
- 4-15% target's PvE Damage Boost and -7.5% PvP Damage Boost for 10s✓ RecommendedUnlocks at total Lv. 12
- 5-5s cooldown✓ RecommendedUnlocks at total Lv. 16
Recommended selections
Support damage or utility under the condition written on this option. Control and kill-triggered effects depend on the target. Do not assume a boss can be controlled.
Global 1.0.21.0 client-data display; editorial recommendations · Specialty reference ↗

Shock Release
Base Lv. 1 → 1Removes specified control and grants temporary control immunity; unaffected by cooldown reduction.
Use it: Keep separate from offensive macros for a needed escape or heal.
Special abilities · Specialty
Recommended setup · Total Lv. 20 · 3 slots
- 1Adds [Crushing Strike] Chain SkillOptionalUnlocks at total Lv. 8
- 2Restores 1000 Stamina on using [Defiance]✓ RecommendedUnlocks at total Lv. 8
- 3Restores 10% HP on using [Defiance]✓ RecommendedUnlocks at total Lv. 8
- 4+2s Tenacity durationOptionalUnlocks at total Lv. 12
- 5+50% PvE Damage Tolerance and +25% PvP Damage Tolerance for Tenacity duration✓ RecommendedUnlocks at total Lv. 16
Recommended selections
Support damage or utility under the condition written on this option. Keep this emergency control break manual. Do not buy bonus ranks solely to copy the preview.
Global 1.0.21.0 client-data display; editorial recommendations · Specialty reference ↗
Passive skills & investment priorities
Max these passives first — in this order
For Farm, put your passive upgrade points into the priority skills below. Max the first one, then the next, until this list is complete. Do not spread points across optional passives first.
- Attack Preparation — max Base Lv. 10
- Wind's Promise — max Base Lv. 10
- Inspiring Spell — max Base Lv. 10

Attack Preparation
1. Max first · Base Lv. 10Raises damage amplification, defense and accuracy.
An early priority for broad combat value; the official Korean text contains a duplicated PvE label, so no invented PvP value is listed.

Wind's Promise
2. Max first · Base Lv. 10Raises critical-damage amplification and can add damage on critical hits.
A core offensive passive that benefits from reliable critical chance.

Inspiring Spell
3. Max first · Base Lv. 10Raises critical and perfect-hit chance.
A main offensive passive after establishing the core rotation.
Optional passives — after your priorities
Keep these at their initial rank while completing the priority list. Invest leftover points only when their effect helps your build or encounter.

Blessing of Life
Optional · upgrade after the priority listRaises maximum HP and healing amplification based on attack.
Supports a progression/healing role as well as personal survival.

Cross Guard
Optional · upgrade after the priority listRaises block and heals after a successful block.
Conditional defense; less central than reliable damage passives for comfortable farming.

Protective Circle
Optional · upgrade after the priority listHits build stacks; ten grant a party shield and can refresh it. Also grants a separate low-health personal shield.
Attack uptime contributes group protection, but do not rely on a proc alone for a lethal mechanic.

Impact Hit
Optional · upgrade after the priority listRaises impact accuracy and a bonus-hit stat.
A situational investment; evaluate its actual tooltip instead of calling every component PvP-only.

Raging Spell
Optional · upgrade after the priority listAdds damage against impact-controlled or staggered targets.
Prioritize with Gust Rampage for boss-stagger play; lower priority in ordinary quest farming.

Earth's Promise
Optional · upgrade after the priority listHits periodically reduce enemy PvE/PvP damage tolerance; the reduction does not apply alongside Cleric's Chain of Torment.
Coordinate with Cleric rather than counting both debuffs as additive.

Survival Willpower
Optional · upgrade after the priority listRaises resistance and defensive benefits under specified control effects.
Useful when control pressure is a real threat; does not replace Shock Release.
Full class guide — gear, skills & sources
Chanter combines a Dark Crush damage chain with party buffs, cleansing, recovery and protective effects. Good support play means preserving those tools for the incoming mechanic while continuing damage when the group is stable.
Original English synthesis reviewed 29 September 2026. Core effects follow NC’s Korean descriptions; rank-specific build advice is attributed to the reviewed videos. Use the progression stage and regional build stated here when choosing a preset.
Compare gear & save your setup
Explore exact item variants with +0 stats and source-listed acquisition categories. These examples support the gear discussion; they are not a best-in-slot ranking.
Equipment examples & food records










Black Dragon Beef Wellington — 흑룡의 비프 웰링턴

 Ludra's Bracelet
 Ludra's Heart



White Dragon Beef Wellington — 백룡의 비프 웰링턴
White Dragon Chop Steak — 백룡의 찹스테이크
White Dragon Fruit Juice — 백룡의 과일 주스
White Dragon Seafood Pasta — 백룡의 씨푸드 파스타
GLOBAL EU · Support / melee
Chanter consumables
Prepare both attacking uptime and personal sustain. Refresh consumables in safe gaps while keeping your group responsibilities ahead of an extra damage action.
Role recommendations are editorial. Item effects come from NC’s Global EU records, checked 30 September 2026; the rest of this class guide keeps its own region scope.
Before attacking
 Power Shard (Bound)
Activate for attack windows; ordinary shards are the budget starting point.
 Courage Scroll (Bound)
Food choice
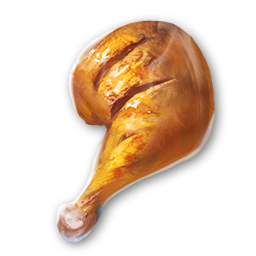 Artisan's Roasted Fogus (Bound)
An all-faction attack/accuracy food option from supplies and rewards. A practical choice when already owned; check stock before buying alternatives.
Role priority
 Absorption Scroll (Bound)
Use before predictable incoming damage. The per-hit limit and total absorption cap are different limits; this is a finite shield, not immunity.
Personal emergency
 Life Crystal (Bound)
Check the level requirement. Keep instant recovery reachable; avoid overhealing.
Use attack/accuracy food for comfortable fights and choose survivability when progression demands it. Carry MP recovery if your support rotation is resource-limited; do not assume consumables stack with every party buff.
 Battle Enhance Scroll (Bound) is an optional damage-and-survival addition for serious attempts.
  Superior Healing Potion is a personal cleanse for eligible effects, not an HP heal.

Quick start: role, strengths and tradeoffs
Build recommendationChanter combines a
| Topic | Practical meaning |
|---|---|
| Strength | Party offensive/defensive support while maintaining an active melee/ranged-trigger damage chain. |
| Tradeoff | Early MP and support timing require attention; a full damage macro does not decide when the party needs a cleanse. |
| Group role | Coordinate overlapping buffs with Cleric and assign recovery/mitigation instead of duplicating every effect. |
Evidence: NC · official Chanter skills ↗ · aLuckyRO · 2026-09-12 ↗ · aLuckyRO · 2026-09-14 ↗ · notXeon · 2026-09-28 ↗
Choose a four-slot PvE Stigma loadout
Build recommendationEquip one row, not every listed Stigma simultaneously. These are editorial presets derived from the mechanics and reviewed builds; change the flex slot for an actual encounter requirement.
| Preset | Four Stigmas | When to use it |
|---|---|---|
| Group PvE support | Invincibility Mantra; Power of the Gale; Crushing Blow; Power of Protection | Core party buff, burst support, debuff and planned mitigation. |
| Comfortable damage farm | Invincibility Mantra; Crushing Blow; Marchutan's Wrath; Speed Mantra | More damage-chain/travel utility where the party does not need extra mitigation. |
| High recovery demand | Invincibility Mantra; Power of the Gale; Healing Touch; Barrier Spell | Trade damage flexes for healing and a planned survival response; use the slots your current rank allows. |
Evidence: NC · official Chanter skills ↗ · aLuckyRO · 2026-09-12 ↗ · aLuckyRO · 2026-09-14 ↗ · notXeon · 2026-09-28 ↗
Before the pull
Build recommendationCheck your preset, resource bar, selected specialties and party assignments before starting. A developed rotation only works when its rank-dependent effects are actually equipped.
- Confirm the party role and required survival or control tool.
- Confirm your main skill-rank thresholds in the skill screen after changing gear.
- Use the appropriate consumable and position for both damage and party support.
- Identify the first dangerous mechanic and reserve the skill that answers it.
Evidence: NC · official Chanter skills ↗ · aLuckyRO · 2026-09-12 ↗
Opening rotation: step by step
Build recommendationUse this as a decision sequence. Skip unavailable conditional skills and interrupt for mechanics; do not stand idle waiting for the entire opener to return.
- Confirm which Cleric/Chanter buff will apply and activate
- Time
- Use
- Continue
- Keep
Evidence: NC · official Chanter skills ↗ · aLuckyRO · 2026-09-12 ↗ · aLuckyRO · 2026-09-14 ↗ · notXeon · 2026-09-28 ↗
Single-target priority and resource loop
Build recommendationThe next correct action depends on buffs, target state, resources and the upcoming mechanic.
| Priority | Action | Execution |
|---|---|---|
| 1 | Group mechanic | A needed cleanse, shield or recovery overrides another attack. |
| 2 | Dark Crush | Consume activation; avoid wasting another trigger first. |
| 3 | Spinning Strike | Maintain the critical-damage benefit and use its trigger relationship. |
| 4 | Backdraft Crush / selected trigger Stigma | Marchutan's Wrath adds a trigger but its stationary cast is a movement tradeoff. |
| 5 | Inexorable Blow / Slaughter | Use the resource builder and spender together; Gust Rampage belongs to actual stagger windows. |
Evidence: NC · official Chanter skills ↗ · aLuckyRO · 2026-09-12 ↗ · aLuckyRO · 2026-09-14 ↗ · notXeon · 2026-09-28 ↗
Skill progression and specialty milestones
Build recommendationTotal skill level includes bonus ranks. Mastery Specialty slots open at total levels 8, 12 and 20: one, two and three slots respectively. All five options are available at total 16, but only two can be selected until total 20. Stigma milestones are separate and must be read on the specific skill.
| Skill | Milestone | What changes |
|---|---|---|
| Slaughter | Early level 8 | MP recovery for sustained attacks. |
| Inexorable Blow | Early specialty | MP reduction first; single-target damage once resources permit. |
| Dark Crush | Core investment | Critical-oriented early damage choice; HP absorption is a survival alternative. |
| Spinning Strike | Early cooldown option | The reviewed setup takes the five-second reduction. |
| Recuperation | Healing investment | Consecutive casts improve flexibility and allow separate cleansing responses. |
| Invincibility Mantra | Developed priority | aLuckyRO prioritizes its progression after the functional loadout, including his level-10 accuracy milestone and later level-20 goal. |
| Crushing Blow / Marchutan's Wrath | Source-build level 5 goals | Establish useful cooldown/damage-trigger functionality before spreading Stigma ranks thin. |
Evidence: NC · official Chanter skills ↗ · aLuckyRO · 2026-09-12 ↗ · aLuckyRO · 2026-09-14 ↗ · notXeon · 2026-09-28 ↗
Passive skills: what earns its points
Build recommendation
Evidence: NC · official Chanter skills ↗ · aLuckyRO · 2026-09-12 ↗ · aLuckyRO · 2026-09-14 ↗ · notXeon · 2026-09-28 ↗
Packs, area damage and farming
Build recommendationStand where
Evidence: NC · official Chanter skills ↗ · aLuckyRO · 2026-09-12 ↗ · aLuckyRO · 2026-09-14 ↗ · notXeon · 2026-09-28 ↗
Group mechanics, survival and utility
Build recommendationGroup recovery priority: move into coverage, remove a dangerous weakening effect with
Evidence: NC · official Chanter skills ↗ · aLuckyRO · 2026-09-12 ↗ · aLuckyRO · 2026-09-14 ↗ · notXeon · 2026-09-28 ↗
Cleric pairing: avoid duplicate support
Build recommendationAgree on responsibilities before the pull.
| Function | Skills | Coordination |
|---|---|---|
| Damage/tolerance aura | Invincibility Mantra vs Light of Protection | Higher level applies; Chanter wins an equal-level tie. |
| Enemy tolerance reduction | Earth's Promise vs Chain of Torment | Do not count both reductions together. |
| Burst support | Power of the Gale | Coordinate the one-minute exclusion for the corresponding Cleric Earth blessing effect. |
| Recovery | Recuperation / Healing Touch | Chanter covers planned cleanse or recovery while Cleric handles the agreed next response. |
| Emergency survival | Barrier Spell | Account for shared survival-effect lockouts and powerful-attack exceptions. |
Evidence: NC · official Chanter skills ↗ · aLuckyRO · 2026-09-12 ↗
Daevanion: route priorities
Build recommendationRoute through
Select the destination, inspect all prerequisite nodes and compare the total cost. A nearby useful passive can make a slightly different route better than the shortest route through irrelevant bonuses. Save the preset before testing a different role.
Evidence: NC · Daevanion ↗ · NC · official Chanter skills ↗ · aLuckyRO · 2026-09-12 ↗
Bonus skill ranks: board, accessories and Arcana
Build recommendationPrioritize the main damage chain and the healing utility you actually use. Total skill ranks come from points, board and equipment/Arcana; plan a complete useful threshold rather than adding a little to every skill. Keep separate solo and party presets so a resource-efficient farming setup does not remove required group recovery.
Evidence: NC · official Chanter skills ↗ · aLuckyRO · 2026-09-12 ↗ · aLuckyRO · 2026-09-14 ↗ · notXeon · 2026-09-28 ↗
Gear and stat decisions
Build recommendationAttack contributes to
Compare the same encounter and buff conditions. Accuracy is a requirement against the actual target, not one universal number. A rank threshold, a survivable hit or a sustainable resource loop can be worth more than a small increase in displayed combat power.
Evidence: NC · official Chanter skills ↗ · aLuckyRO · 2026-09-12 ↗ · aLuckyRO · 2026-09-14 ↗ · notXeon · 2026-09-28 ↗
Equipment checklist by slot
Build recommendationUse this as an upgrade worksheet. Exact affix pools and item tiers depend on the item record; do not assume every desired effect can roll on every slot.
| Slot | Look for | Decision rule |
|---|---|---|
| Weapon / offhand | Main damage and available offensive rolls | Compare attack, useful speed/amplification and cost; retain the core skill-rank plan. |
| Armor | Survival and relevant specialty affixes | Solve the mechanic that kills you; then compare offensive affixes actually present in that item pool. |
| Gloves / boots | Useful speed and movement | Movement improves mechanic execution; speed value depends on the class loop. |
| Rings / accessories | Functional skill ranks and appropriate stats | Complete a useful total-rank threshold before paying heavily for cosmetic combat-power gains. |
| Manastones / rerolls | One affordable useful improvement first | Do not exhaust the budget chasing several perfect rolls on an item being replaced soon. |
| Arcana | Ranks plus a coherent set effect | Count the resulting skill levels after each replacement. |
Evidence: NC · official Chanter skills ↗ · aLuckyRO · 2026-09-12 ↗ · aLuckyRO · 2026-09-14 ↗ · notXeon · 2026-09-28 ↗
Arcana planning
Build recommendationTarget
Evidence: NC · official Chanter skills ↗ · aLuckyRO · 2026-09-12 ↗ · aLuckyRO · 2026-09-14 ↗ · notXeon · 2026-09-28 ↗
Food buffs and sustain
Build recommendationThe linked items below are official Korean crafted-food records. Values and durations belong to those records. Choose a food that solves the current damage, resource or survival need; do not assume overlapping food effects stack.
| Food | Duration | Official-record effects |
|---|---|---|
| White Dragon Beef Wellington ↗ / Black Dragon Beef Wellington ↗ | 300 seconds | Attack 16, defense 162, accuracy 12, status resistance 3%, stamina 300; faction variants. |
| White Dragon Fruit Juice ↗ | 300 seconds | Natural MP recovery 36, flight 60 and stamina recovery 50%; useful for mana-constrained classes. |
| White Dragon Chop Steak ↗ | 300 seconds | HP 148, MP 74, defense 162, block 12, status resistance 3%, stamina 300. |
| White Dragon Seafood Pasta ↗ | 300 seconds | Critical 12, evasion 12, block 12, status resistance 3%, stamina 300. |
Evidence: NC · White Dragon Beef Wellington ↗ · NC · Black Dragon Beef Wellington ↗ · NC · White Dragon Fruit Juice ↗ · NC · White Dragon Chop Steak ↗ · NC · White Dragon Seafood Pasta ↗
In-game macro and manual controls
Build recommendationUse the built-in macro only for the repeatable damage portion you have tested. Keep control breaks, important defensives, group healing, charged casts and unsafe movement deliberate. Start with basic-attack/spender resource weaving, then add one priority at a time. Verify that attacks actually fire and the resource bar stays stable. Creator delay values depend on speed, latency and input settings; copy the logic before the timing.
Evidence: NC · official Chanter skills ↗ · aLuckyRO · 2026-09-12 ↗ · aLuckyRO · 2026-09-14 ↗ · notXeon · 2026-09-28 ↗
Common mistakes and source disagreements
Build recommendation
Evidence: NC · official Chanter skills ↗ · aLuckyRO · 2026-09-12 ↗ · aLuckyRO · 2026-09-14 ↗ · notXeon · 2026-09-28 ↗
Upgrade order and a useful practice check
Build recommendationSpend to remove the current bottleneck, then retest under comparable conditions.
- Make the four-slot loadout functional and equip the useful early specialties.
- Complete the main bonus-rank threshold through the cheapest available combination of board and equipment.
- Address misses, resource failure or deaths before chasing a marginal damage reroll.
- Practice a full sustained window, then a moving/interrupting window; track missed procs and expired buffs.
- Reassess the flex slot for the next dungeon rather than copying a fixed preset everywhere.
Evidence: NC · official Chanter skills ↗ · aLuckyRO · 2026-09-12 ↗ · aLuckyRO · 2026-09-14 ↗ · notXeon · 2026-09-28 ↗
Creator perspective
Attributed opinions from reviewed video captions. These are individual assessments, not a player consensus or verified performance rankings.
aLuckyRO · 2026-09-12
Full transcript reviewed: limited points, mana, healing and Stigma priorities.
Full transcript reviewed: limited points, mana, healing and Stigma priorities.
Chanter early skill and Stigma build ↗aLuckyRO · 2026-09-14
Reviewed 3–20 min and 24–29 min; repeats some earlier skill material, adds board routes.
Reviewed 3–20 min and 24–29 min; repeats some earlier skill material, adds board routes.
Chanter board and macro guide ↗notXeon · 2026-09-28
Full transcript reviewed: Dark Crush chain and movement tradeoff of Marchutan's Wrath.
Full transcript reviewed: Dark Crush chain and movement tradeoff of Marchutan's Wrath.
Chanter weaving and in-game macro ↗Sources & research scope
Original English synthesis. Video advice is labelled by progression stage; official Korean descriptions establish the core effects. Review date: 29 September 2026.
NC · official Chanter skills ↗
All 35 Korean skill descriptions and available icons inspected on 29 September 2026. English effect summaries are original editorial translations.
aLuckyRO · 2026-09-12 ↗
Full transcript reviewed: limited points, mana, healing and Stigma priorities.
aLuckyRO · 2026-09-14 ↗
Reviewed 3–20 min and 24–29 min; repeats some earlier skill material, adds board routes.
notXeon · 2026-09-28 ↗
Full transcript reviewed: Dark Crush chain and movement tradeoff of Marchutan's Wrath.
NC · Daevanion ↗
Official connected-node board mechanics and board identities; read alongside the creator progression order.
NC · White Dragon Beef Wellington ↗
Official Korean item detail inspected 29 September 2026. English item name is an editorial translation; Korean lookup name is retained in the food table.
NC · Black Dragon Beef Wellington ↗
Official Korean item detail inspected 29 September 2026. English item name is an editorial translation; Korean lookup name is retained in the food table.
NC · White Dragon Fruit Juice ↗
Official Korean item detail inspected 29 September 2026. English item name is an editorial translation; Korean lookup name is retained in the food table.
NC · White Dragon Chop Steak ↗
Official Korean item detail inspected 29 September 2026. English item name is an editorial translation; Korean lookup name is retained in the food table.
NC · White Dragon Seafood Pasta ↗
Official Korean item detail inspected 29 September 2026. English item name is an editorial translation; Korean lookup name is retained in the food table.
Skill field guide
35 selected skills. Short functional summaries; English names are working translations. Open a skill for its role, upgrade recommendations and source context.
Official Korean skill list ↗ · Source updated 2026-09-02
Mastery · active
Slaughter ↗
격파쇄 - 공명쇄 - 벽력쇄Basic attack chain that damages enemies and restores MP.
Inexorable Blow ↗
백열격 - 파열격Repeatable attack chain with stagger damage.
Rushing Smash ↗
돌진 격파Gap-closing attack that restores MP and contributes to stagger.
Backdraft Crush ↗
타격쇄Attack with stun potential and stagger damage.
Dark Crush ↗
암격쇄Mobile ranged damage activated by ranged-skill use.
Gust Rampage ↗
질풍 난타Damage against a staggered target.
Headlong Blow ↗
열파격After a successful block, deals area damage with sealing potential.
Recuperation ↗
쾌유의 주문Immediate party-area heal and one weakening-effect removal, followed by healing over time.
Tremor Crash ↗
진동쇄After emergency evade, moves to the target and attacks with stun potential.
Wave Blow ↗
파동격Hits a stunned target and knocks it down.
Spinning Strike ↗
회전격Mobile area attack that stacks personal critical-damage amplification up to twice.
Shock Release ↗
충격 해제Removes specified control and grants temporary control immunity; unaffected by cooldown reduction.
Mastery · passive
Blessing of Life ↗
생명의 축복Raises maximum HP and healing amplification based on attack.
Cross Guard ↗
십자 방어Raises block and heals after a successful block.
Protective Circle ↗
보호진Hits build stacks; ten grant a party shield and can refresh it. Also grants a separate low-health personal shield.
Inspiring Spell ↗
고취의 주문Raises critical and perfect-hit chance.
Attack Preparation ↗
공격 준비Raises damage amplification, defense and accuracy.
Impact Hit ↗
충격 적중Raises impact accuracy and a bonus-hit stat.
Raging Spell ↗
격노의 주문Adds damage against impact-controlled or staggered targets.
Earth's Promise ↗
대지의 약속Hits periodically reduce enemy PvE/PvP damage tolerance; the reduction does not apply alongside Cleric's Chain of Torment.
Survival Willpower ↗
생존 의지Raises resistance and defensive benefits under specified control effects.
Wind's Promise ↗
바람의 약속Raises critical-damage amplification and can add damage on critical hits.
Stigma · optional skills
Obliterate ↗
멸화Area attack with knockdown potential and stagger damage.
Invincibility Mantra ↗
불패의 진언Party damage amplification/tolerance toggle; does not stack with Cleric's Light of Protection. Higher skill level wins, Chanter wins a tie.
Focused Defense ↗
집중 방어Maintained frontal weapon block with improved block reduction; successful blocks restore MP/action points.
Speed Mantra ↗
질주의 진언Party movement-speed toggle with chance-based healing on attacks.
Crushing Blow ↗
분쇄격Rapid gap-closing hit that lowers enemy defense; deals more damage against impact-controlled targets.
Marchutan's Wrath ↗
마르쿠탄의 분노Area attack that temporarily activates Dark Crush.
Power of Protection ↗
차단의 권능Temporarily generates HP-scaled shields when the caster or nearby party members take attacks.
Ensnaring Mark ↗
결박의 낙인Area damage and sealing potential.
Healing Touch ↗
쾌유의 손길Mobile heal for the caster and nearby party members.
Power of the Gale ↗
질풍의 권능Party combat-speed buff and cooldown reduction; recipients cannot gain Cleric's corresponding Earth blessing effect for one minute.
Guardian's Blessing ↗
수호의 축복Raises personal maximum HP and immediately restores health; cannot be removed by buff dispel.
Assault Impact ↗
강습 충격Area HP/MP damage and stun potential; defense rises with targets hit.
Barrier Spell ↗
결계의 주문Temporarily prevents party HP from dropping below a threshold, with exceptions for powerful attacks and a shared anti-immunity lockout.
Skill icons © NC. Used to identify the referenced game skills. No open license is asserted.